
用 Docker Swarm 与 Portainer 管理多机容器
当只有少量的服务器用于容器化时,人工维护是可行的;而当服务器数量到了 5 台及以上时,就不太可行了。所以,繁琐的事情就交给机器吧!
本文演示了如何借助于 Docker Swarm 以及 Portainer 来完成多台服务器的管理。
话外音:可能有人会说 Swarm 已经是过时的玩意儿了. 没错,从技术的发展来看是这样,但终究“没有最好的,只有最适合的”。Swarm 为 Docker 自带的功能意味着无需任何额外的安装就可以工作,简单、高效且实用。与 docker-compose 相比,可以跨结点;与 K8S 相比,没有学习曲线。那何乐而不为呢?
准备工作 - 多机运维
为方便多机运维,一定要借助工具,否则就手残警告了。可以使用 pssh 即 parallel-ssh 或者 Ansible。
Centos 下安装:
yum install pssh
parallel-ssh 的官方安装步骤写的是通过 pip 安装,然而这只是安装了一个 python package,最后是找不到 parallel-ssh 命令的。
pssh 的使用方式:
pssh -i -h host_file "command"
-h 指定使用的hosts文件,每行对应一台机器名,比如:
$ cat example
192.168.1.10
192.168.1.11
-i 意为将命令执行过程中的 std output 和 std error 显示出来。
在开始示例之前,先对服务器节点情况做个说明。4台服务器构成这个集群, 其中 s3 为 Manager,其余节点为 Worker。由于我在 /etc/hosts 里配置好了机器名,所以此处没有使用ip。对于多台机器的日常运维,在 hosts 文件里定义 hostname 实际上是非常有必要的。
$ cat all
s3
s4
s5
s6

$ cat worker
s4
s5
s6
话外音:命令行工具一般都需要配置到远程服务器的 ssh 免密登录,切记切记。
示例: 安装Docker
$ pssh -i -h all "yum install -y yum-utils device-mapper-persistent-data lvm2"
$ pssh -i -h all "yum-config-manager --add-repo https://download.docker.com/linux/centos/docker-ce.repo"
$ pssh -i -h all "yum install -y docker-ce-18.06.3.ce"
$ pssh -i -h all "systemctl start docker"
$ pssh -i -h all "systemctl status docker"
构建 Swarm Cluster
将 s3 作为 Manager:
$ ssh s3 docker swarm init
将所有 worker 节点加入至 Cluster:
$ pssh -i -h worker "docker swarm join --token SWMTKN-1-2mrlklcqwe7sckqjpxiaxgbrds2gfxa5dq3enmswrr51kv60iy-8hlptnodxw9gbpjtkgaln8ydk 10.57.5.3:2377"
$ ssh s3 docker node ls
ID                           HOSTNAME      STATUS  AVAILABILITY  MANAGER STATUS
3ir3z6bi3odzjzcejpxwhbqsv *  ip-10-57-5-3  Ready   Active        Leader
8ii7p4pdow19zcx85fp2cxpk5    ip-10-57-5-4  Ready   Active
eoq7kfc5z38kbl0tn435adwnb    ip-10-57-5-5  Ready   Active
vwxw1qbsj9mtisqhw6610nlb9    ip-10-57-5-6  Ready   Active
安装 Portainer
Portainer 有多种工作模式,我选择的模式为:
- 将
Portainer Server运行于Swarm Cluster之外的单独的机器s2,以便于管理多个Swarm Cluster - 将
Portainer Agent以service的形式运行于Swarm Cluster
安装 Portainer Server
$ ssh s2
$ docker run -d -p 8000:8000 -p 9000:9000 \
  --name=portainer \
  --restart=always \
  -v /var/run/docker.sock:/var/run/docker.sock \
  -v portainer_data:/data \
  portainer/portainer
通过 s2 的 ip 和 9000 端口 http://s2:9000 来访问 Portainer 的界面。首次访问时,可设置管理员账号的 登录名 及 密码 。
安装 Portainer Agent
# Only networks scoped to the swarm can be used, which means the `overlay` driver must be used
$ ssh s3 docker network create -d overlay portainer_agent_network

# when creating a service, errors like
#    docker service ContainerSpec: "–-mount" is not a valid repository/tag
# means
#   There are several discussions threads around this. The error may actually be
#   quite innocent. You may have copied the command from a browser, and the
#   hyphens may not be parsed correctly. As simple as that.
# see:
#   https://www.dedoimedo.com/computers/docker-swarm-intro.html
$ ssh s3 docker service create \
  --name portainer_agent \
  --network portainer_agent_network \
  --publish 'mode=host,target=9001,published=9001' \
  -e 'AGENT_CLUSTER_ADDR=tasks.portainer_agent' \
  --mode global \
  --mount 'type=bind,src=//var/run/docker.sock,dst=/var/run/docker.sock' \
  --mount 'type=bind,src=//var/lib/docker/volumes,dst=/var/lib/docker/volumes' \
  --mount 'type=bind,src=/,dst=/host' \
  portainer/agent
将 Swarm Clusters 托管至 Portainer
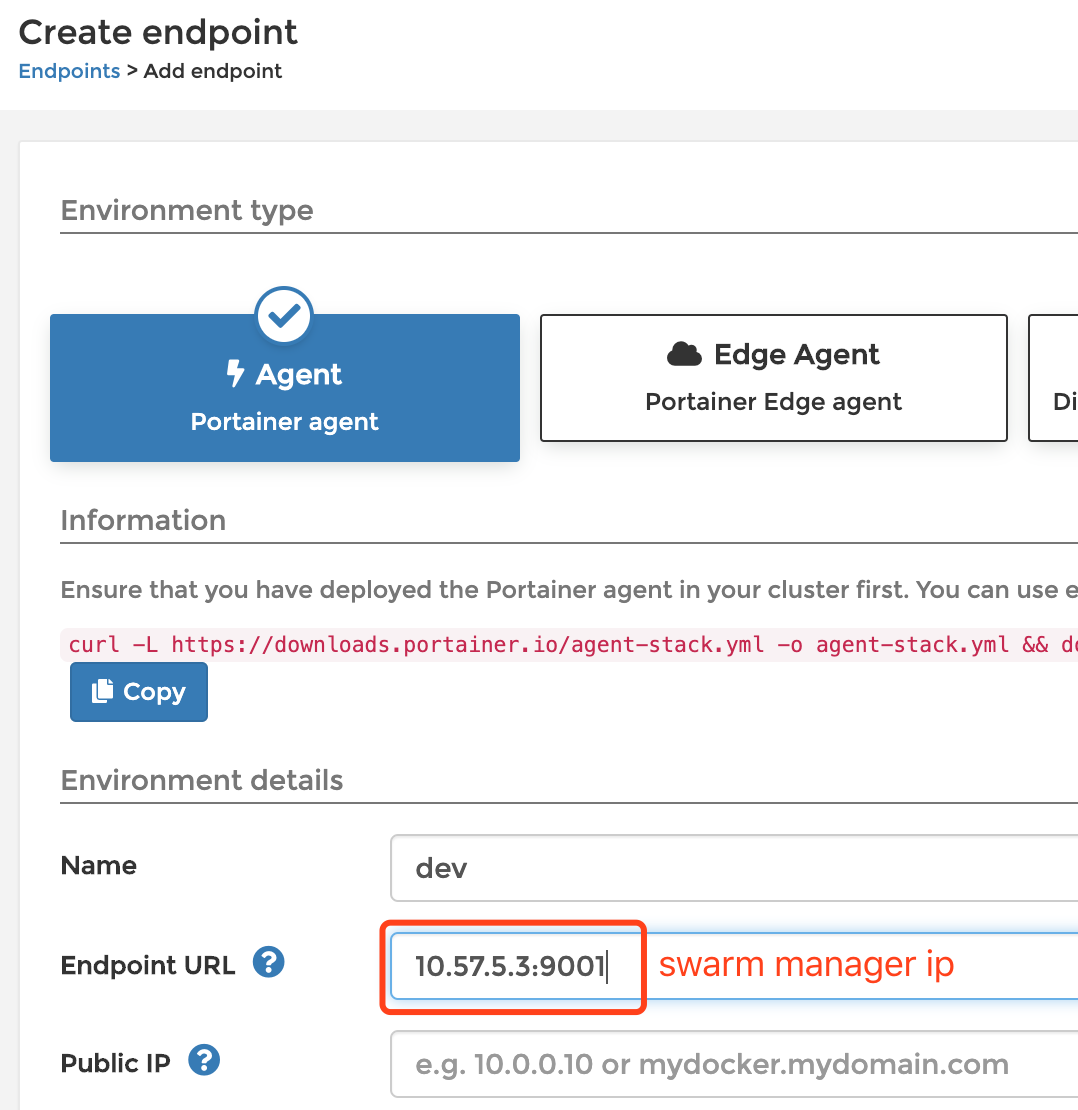
通过浏览器访问已经安装好的 Portainer 界面,通过左侧的 Endpoint 来接入 Swarm Cluster :
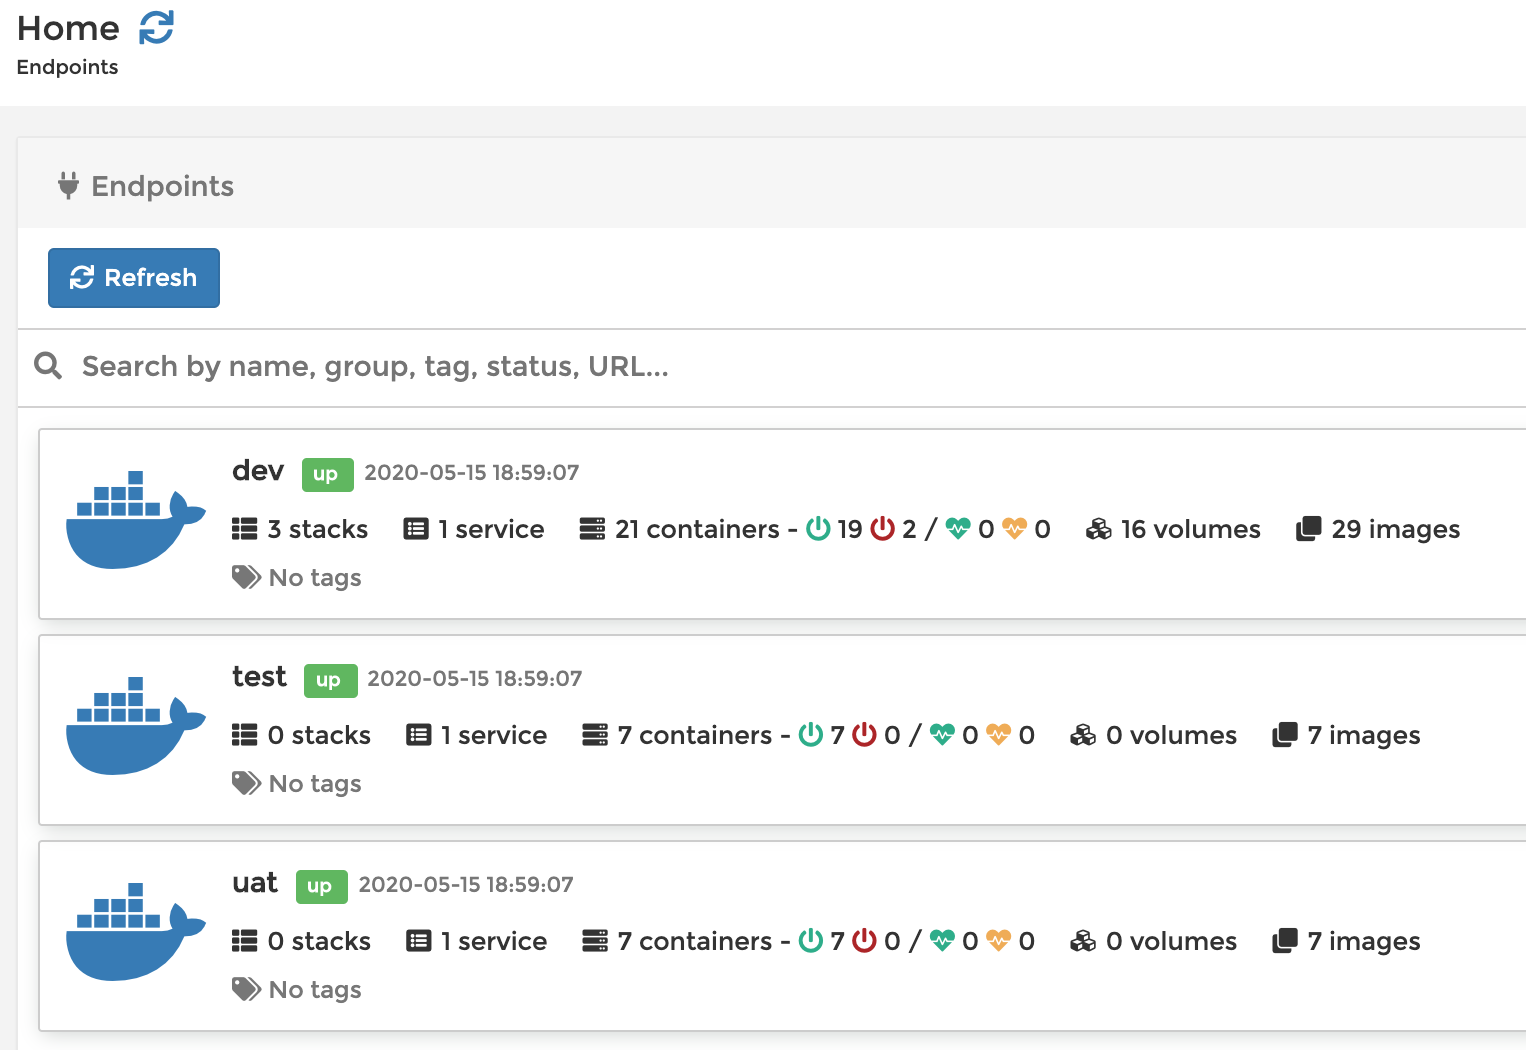
依照同样的方式将其他的集群全部接入后,通过左侧的 Home 可以查看已接入的所有集群:
总结
Swarm 尚能一用,只要找到合适的队友。不如,试一试吧?